Written By Chris Conway
July 31, 2012
Once we found the boat the real work began. We needed to familiarize ourselves with all of the boat’s systems, rigging and living areas in 7 ½ months- most of which was during the winter. During the survey we made a list of all the issues that needed to be addressed and the improvements we would want to make for a trip like ours. The boat was in excellent condition, but the survey did turn up some issues. The most significant were engine/propeller related. One was the cutlass bearing which needed immediate replacement before we could move the boat from Essex. The cutlass bearing is a piece of rubber that aligns the propeller shaft where it exits the boat. This meant that the boat needed to be hauled and the shaft removed to put on a replacement. The other major issue was a slow leak in the heat exchanger, which is like a radiator in a car. The leak was small enough that we could wait to fix it over the winter, but the yard in Essex estimated that the entire heat exchanger would need to be replaced at a cost of $2400.
After we moved the boat from Essex to Haverstraw, I began formulating my plan of attack to both learn the boat’s systems and make the many improvements we would need for our journey. I will be writing a series of blogs covering each major system of the boat and how I approached the preparations.
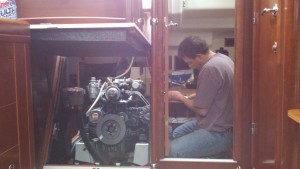
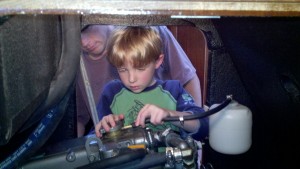
First on my checklist was getting acquainted with the engine. I took a three-day course in December on diesel engine maintenance at Mack Boring, which is the Northeast dealer for our engine type, a Yanmar diesel. The course was excellent and I was able to work on the same model engine as the one in Patronus. We learned everything from basic maintenance like oil changes to doing valve adjustments and removing fuel injectors. More importantly, I found out that the leak on our heat exchanger could be fixed instead of replaced. So armed with a little bit of knowledge and a new set of Craftsman sockets, I decided to disassemble the heat exchanger.
Three weekends later and one mild case of frostbite on my toes, I had disassembled the heat exchanger from the engine. In addition to removing the salt and freshwater lines from the heat exchanger, I also had to remove the turbo charging unit since it attaches to the back of the heat exchanger. I brought the heat exchanger to Samalot Marine, which is the local service yard in the Haverstraw marina. They sent it on to Mack Boring and $250 later it was repaired. I also ordered some new bolts to replace some of the worn/rusted ones as well as any of the gaskets that I had removed. Now came the difficult part: put it all back together with no leftover parts.
Armed with my new torque wrench and the repaired heat exchanger, I began attempting to reinstall it on the engine. In my haste I failed to carefully read the directions on my torque wrench, assuming that it worked like the one I used in the Mack Boring class. That one would click stop torqueing when you hit the preset torque level. Mine made a clicking noise, but allowed you to keep torqueing the bolt. I then proceeded to torque the head off of one bolt and hour-glass another. At least I now had the opportunity to learn how to remove a bolt without a head! Unfortunately, I didn’t have quite as positive an outlook the day I torqued the bolt head off. Other than that, the reinstallation actually went smoothly and I did not end up with any spare parts.
Another main area I wanted to address on the engine was upgrading the alternator. The world of marine alternators is a little complex. There are many different types on the market and I spent many a night researching and educating myself on the pros and cons of the various makes and models. For example, there are some alternators that perform better at lower RPMs, which would be good if someone were using their engine to charge the batteries while at anchor. I wanted to find an alternator that would have a high output at higher RPMs since we would be using the generator to charge the batteries at anchor and wanted the alternator to primarily charge the batteries when motoring between ports. I chose a Balmar 100 amp alternator since it was about the largest I could get without having to upgrade the pulley system on the engine due to the strain of a larger alternator. The installation went smoothly with no over-torqued bolts and no one getting electrocuted in the process.
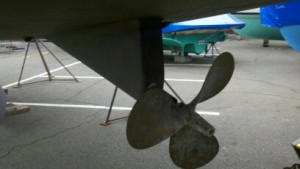
Finally I wanted to address the propeller and began researching the various propellers on the market. I needed to deal with the fact that the current three blade fixed propeller would have an effect on both our speed when sailing as well as the performance of the rudder since it would be causing turbulence right in front of the top third of the rudder. After getting thoroughly confused by the conflicting opinions on the sailing forums, I spoke with my friend Dave Armitage’s uncle, Steve Armitage, about the boat and the kind of sailing we were going to be doing. I was torn between the Gori folding propeller and the Autoprop variable pitch propeller. After weighing the pros and cons of each I went with the Gori three blade folding propeller. Aside from the obvious advantage of the minimal drag when sailing, the Gori also has an overdrive feature that we have been using quite a bit to enhance efficiency when motor sailing. After several days of futility I enlisted Samalot marine to remove the old prop and install the Gori.
Electronics:
The boat’s electronics were functioning, but outdated. It has a standard Raymarine electronics package with two chart plotters that do double duty as the radar plotter as well. It also has the Raymarine auto pilot installed along with the standard speed, depth and wind instruments. I was really interested in upgrading the chart plotter since the one on the boat is decade old technology and can’t interface with the newer AIS (Automatic Identification System) technology. The newer Raymarine plotters are not interchangeable with the older Raymarine instruments which meant to update the plotter would entail updating almost all of the instruments and more importantly the radar. With this in mind I set out to install a completely separate AIS transponder, antenna and plotter.
The AIS transponder would allow other boats with AIS receivers to see my boat’s position, speed, course and how close we will come to each other. Likewise, the transponder also receives this information from any other boat that has a transponder in the area so I can monitor them as well. It’s required for all large commercial vessels so when I hear that engine running in the fog I can check my AIS system to see who it is and where they are going. The installation was a bit tricky since AIS requires a VHF antenna to send its signals. Instead of splitting my masthead antenna, I installed a specially tuned VHF antenna on the first spreader for the AIS to utilize. The height of the first spreader should give me at least a 10 mile radius of transmission which should be plenty as sailboats don’t move that fast. After finally getting the antenna installed and the wire snaked down the mast, I set about installing the plotter at the starboard helm. Fortunately this was much easier as it did not require me to sit in a chair 25 feet above the deck for hours on end like the antenna installation. The AIS system also came with its own GPS antenna so I now have redundant GPS antennas as well as a redundant VHF antenna. All of this is wired into the transponder which sits in my navigation station.
In addition to the electronics mounted in the boat, I also use some of the newer technology on the market. For real-time navigation, I am using iNavX which is an app for the iPhone and iPad. It is a fantastic app and I find myself using it more than the chart plotter on the boat. A bonus is that I can use my iPhone as a chart plotter when we are out in the dinghy. For plotting purposes and as a backup chart plotter, I am using my laptop with the OpenCPN.org software. This is an open sourced program that has been working very well for me for planning purposes. I also run a feed from the transponder to my laptop to get both AIS and GPS data on the OpenCPN.org software.
Sails and Rigging:
Overall, the rigging (general term for the mast and the lines that control the sails) on the boat was in good shape. My concerns were twofold. First, we needed to be covered in the event we were caught in really bad weather. With a few legs of our trip being well offshore, we need to be prepared for really heavy weather. Second, as a racer at heart, I needed sails that I could tune and get some reasonable speed out of so that I can pass all of the other cruisers around me. With this in mind, I focused on replacing/creating three sails: the mainsail (the sail behind the mast that is attached to the boom), a heavy weather storm jib, and a spinnaker. So I called up my friend Dave Armitage, who is the head sail designer for Quantum Sails.
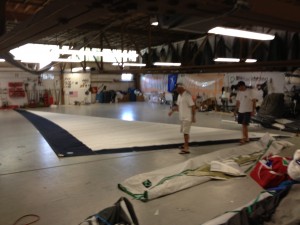
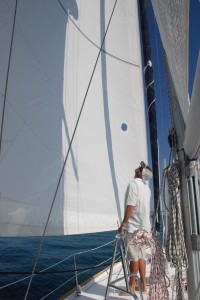
The mainsail was very lightweight as we found out during our delivery from Essex. In the 30+ knot winds, it was blown way out of shape and was not very usable. So I wanted to beef up the mainsail while also getting something that would have some kind of reasonable shape to it. Sails work in a similar way to an airplane wing. There needs to be a nice aerodynamic curve to a sail. This curve is a function of the shape built into the sail by the sailmaker, the fabrics being used to make the sail, and the forces exerted by the various lines controlling the sail. Dave understood what we were trying to accomplish and created a lightweight furling mainsail that was much stronger than our old one due to the advanced materials that Quantum uses in their sails. He put the order in for the sail in March as this was a must-have before we left on the trip.
The heavy weather jib was a big project. On a boat like ours, there needs to be a mechanism to hoist a storm jib. Our main headsail is a genoa, which is a jib where the clew (back corner) of the sail is behind the mast. The genoa is loaded on a roller furling system which means that it is always hoisted and when not in use it is rolled up vertically. This also means that there is no place on the forestay (wire running from the mast to the bow of the boat) to hoist a storm jib without removing the genoa. Typically, by the time you need the storm jib, it is way too rough to go up to the bow and remove the genoa. Many boats install a removable inner forestay, but this presented a problem for us since we would then need to store the storm jib somewhere on the boat and we knew we would be tight on space. So I worked with Samalot Marine to install an inner roller furling unit to house the heavy weather jib. I had the chainplate fitting (part where the inner forestay would attach to the deck) fabricated at a local metalworking shop. Dave Armitage and I then proceeded to give the installation a try ourselves. This meant cutting a large “+” sign in the deck so that the fitting could go through and we could attach it to the forward bulkhead in the boat. Once I made the first few holes in the deck my anxiety subsided and we were on our way. We got the fitting through and set up the bolts below. With that finished, Samalot Marine could proceed with installing the Furlex roller furling unit and inner forestay. Dave is working on cutting down one of the boat’s original jibs to fit our new inner forestay and we will try it out when we are back in Newport in August.
Finally we get to the fun sail! The spinnaker is the big downwind headsail that is often multicolored. Today’s spinnakers are asymmetrical, meaning that they have a front and back, whereas traditional spinnakers were symmetrical and either side could be considered the front. Ours is being designed to fly from the bow of the boat. It will have a “sock”, which is a tube that fits around the spinnaker so it is easy to hoist up and take down. When you pull down on the sock, it gathers the spinnaker into a smaller cloth tube that is easy to handle in the wind. We picked out the color scheme for the sail a few weeks ago and it is being produced as I write this for delivery in August.
We also added a forespar telescoping whisker pole. That is certainly a mouthful to say, but it is a pole that attaches to the mast and holds the clew of the genoa out so that we can sail downwind easier. We used this pole when we were sailing “wing on wing” on our run from Gloucester to Portsmouth.
Electrical Systems:
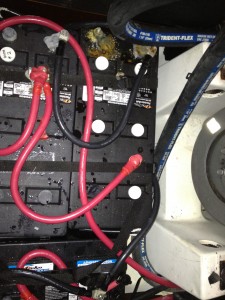
This is by far the most complex of all the systems on the boat. The primary power for all things electric on the boat is the batteries. We have two sets of batteries, a house bank of 3 batteries and a single battery for starting the engine. The batteries that were on the boat when we bought it were shot, so I got to immerse myself in the different types of batteries on the market. I utilized a combination of books, forums and online research to decide on our new batteries, which are AGM (Absorbed Glass Mat). These are premium batteries that cost about twice as much as comparable lead acid batteries (similar to the one in a car). The AGMs had a few advantages that I found attractive. First, they are maintenance-free. Regular lead acid batteries need to be topped off with distilled water on a regular basis. AGMs are sealed so they do not need to be topped off. Second, AGMs do not normally produce any gas, whereas lead acid batteries can produce hydrogen gas during charging. Our batteries are in the engine compartment (right between the two aft cabins where the kids sleep), so the safer the better. Finally, AGMs can absorb charges quicker, which means less time running the generator or engine.
In addition to the batteries, I also focused on reducing the electricity used during normal operations. I changed out all of the interior halogen lights for comparable LED lights. We had 16 overhead lights, which required new bulbs and 8 reading lights, where I replaced the entire fixture. This represents a power savings of up to 80% and the LEDs also produce far less heat, which will be important as we make our way south. I also added a LED combination tricolor and anchor light to the top of the mast. The tricolor light is used at night when we are sailing. It has directional lights that shine red to port, green to starboard and white behind us so other boats know what part of our boat they are seeing. The anchor light must be used at night whenever we are anchored, so it was important that we reduce the amps used by that light since it will be on all night. I also had Samalot install some LED decklights on each spreader, which are activated by a remote control. We figured in addition to helping us find our boat at night in a crowded harbor, the remote control lights can be used as an anti-theft deterrent if we were to hear someone on the deck while we were down below sleeping.
On a lighter note, the stereo was in need of upgrading as it was circa turn of the century technology with a ten CD changer that didn’t work. I went to Best Buy and bought a typical middle of the road car stereo. I thought about getting a “marine” stereo, but since it is down below it shouldn’t get wet and for the extra money the “marine” version costs I can just buy another car stereo in a few years if this one dies. I also added Sirius Satellite radio. The antenna works through the deck which avoids the hassle of drilling through a perfectly good deck!
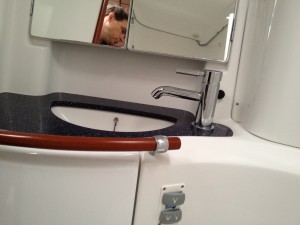
As a condition of buying the boat, I promised Erica that I would replace all of the pitted plumbing fixtures on the boat. This sounded simple enough, but since Beneteau is based in France I found that most of the fittings didn’t fit the new fixtures I bought. Of course they almost fit due to the slight differences between metric and English fittings so I installed everything over the winter and when the boat was finally put in the water in the spring, I found out that all of the fixtures leaked. After messing around with some conversion fittings and getting nowhere, I finally decided to cut the pipes and install new English fittings into the metric pipes. The plastic pipes were much more forgiving than the metal fittings and the new fixtures are leak-free. I also installed a new Seagull water filter and separate faucet for filtered drinking water. The water tanks have appeared to be pretty clean so far, but as we head south the water quality will surely diminish and the Seagull filter was highly recommended on many websites and forums.
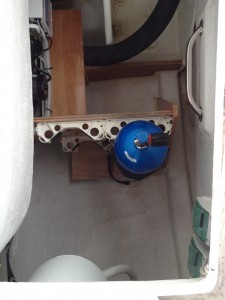
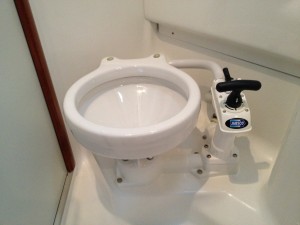 In other areas of plumbing, the head (toilet) in the kids bathroom was not functioning correctly. Apparently you can take these apart to rebuild the pumps, but West Marine was having a sale so I went ahead and for a little over $100 bought a new head. The installation went pretty well, especially considering the difficulties with the faucets. The only major issue I noticed was that the hole in the wall where the waste line runs from the head to the holding tank (where all the sewage goes when we are near shore) wasn’t lined up properly. This was causing the relatively weak plastic toilet fitting to bend and created a small leak. Since leaking sewage on a boat is not desirable, I used my Dremel tool to elongate the hole so the waste line did not stress the toilet fitting. Otherwise the toilet has been performing admirably. I also added two small blocks under the toilet seat so that in rough weather the seat will not slide off of the toilet when someone is trying to use it.
Of course, one of our biggest concerns was how we were going to fit everything on the boat. Even with Erica’s super organization skills, we needed to make a few modifications for storage. One was to build a small storage shelf in one of the aft storage areas to hold the SCUBA diving tanks. I did not want tanks of compressed air moving around at all so I had to find a safe place to tie them down. With Erica’s dad’s help, we built a shelf with a plywood base and 2” foam pieces to fit the contour of the hull. This sat next to a vertical plywood divider. I was able to find a dive tank holder on Ebay that screwed into the plywood. It has two thick rubber straps to hold them in place.
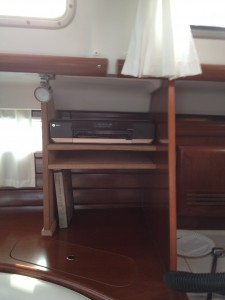 The second big project was adding a shelf in the cabin to house some books and the printer/scanner. The difficulty with this was that the hull creates some interesting curves which have to be replicated on the vertical and horizontal shelf pieces. I used cardboard to make a template and cut the wood at the house and then fit it into place at the boat using a variety of tools. Erica’s dad again helped by staining it right before we left.
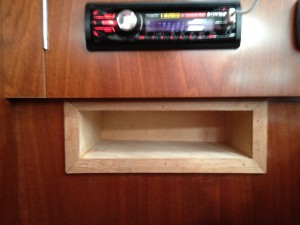 Finally I also added a few custom shelves in existing spaces to fully utilize the space based on the items we were storing. This included a custom shelf in the cavity created by the CD changer that I removed from the nav station area. Perhaps my favorite use of space was the area under the stair in front of the engine. Three of the batteries occupy the lower part of this space, but there is a plywood cover for the top of the batteries. I attached some battery tie down straps to the plywood cover and now can store my large toolbox in that space. It gets a bit warm, but the tools don’t seem to mind!
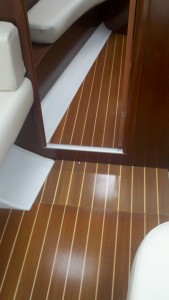 When we purchased the boat, one of the bigger issues was that the floorboard next to the mast was badly damaged by water leaking through the deck from the mast. I ordered a new plywood sheet from the same manufacturer that provides the floors to Beneteau. The color is off a little, but the new sheet has the same basic teak and holly layout so I brought the floor board home and in my basement shop cut the bad section of the old floorboard out and created a new piece to replace it.
Ground Tackle aka Anchor
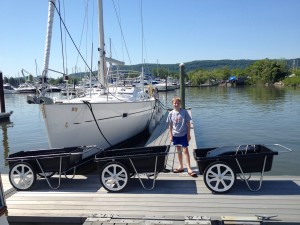
The boat came with two perfectly good anchors, although don’t ask another sailor their opinion on anchors unless you want to start a major debate. On the cruising forums, the anchor debates are the most contested of any topic out there with the exception of guns. We have a 55 pound delta plow style anchor and a Fortress Danforth type anchor as a backup. The Delta is the primary anchor for the boat and I wanted to have an all chain rode since we would be anchoring in a variety of conditions from the rocks of Maine to the coral of the Caribbean. The Fortress did not have any chain and the Delta only had about 50 feet. So I moved the 50 feet of chain over to the Fortress and combined that with the 250 foot line that was already on it and I bought 250 feet of additional 3/8 inch BBB chain for the Delta anchor. I purchased it through the West Marine in Haverstraw, where they loaded it into the back of my car using a fork lift since it weighed over 400 lbs. Now the trick was how to get the chain down the dock to the boat and into the anchor well. Bryson and I loaded the chain into two dock carts, with chain dragging in between them and proceeded to slowly make our way down to the docks. The hardest part would be getting from the land to the floating docks, but we timed the high tide so the dock ramp would be almost level and were able to get down pretty easily. We then flipped the boat around in the slip so the bow was facing in and parked the carts under the bow so we could use the electric windlass to load the chain into the boat. I will also add another 50 feet of line to the end of the chain giving me 300 feet of rode on the both the Delta and the Fortress.

